HOW TO UPDATE SMART IPTV APP?
From time to time apps are updated to resolve bugs or have new features added. Smart IPTV App is no different and it is a good idea to keep it updated. For instance, previous versions didnt have buffer size settings but new versions have this feature which will help you set the app to have an auto detect buffer size mode, 5 seconds buffer size which is good for slow connections and 10 seconds buffer size for bit faster connections. Bug fixes and new features are other good things which make updating to new version a good idea.
While it is good to keep your app updated, doing so is a bit tricky but yet an easy procedure. Here is how it`s done:
Note: This instance is taken from a Samsung Smart TV but other smart tv`s have similar procedure.
1-Open Samsung Smart Hub
2-Go to Featured Apps section
3-If you notice a blue upward arrow next to Smart IPTV App then an update is available
4-Hold down the Enter button on your remote controller until a menu pops up
5-Scroll down to Update Apps and open it
6-A list with available updates will appear
7-Run the update of the app and let the progress bar reaches the end and finishes the update process
For those of you who want to install Smart IPTV on a Samsung smart tv but you can not find it on the app market, here is a simple tutorial to do this manually via a USB flash drive. Doing this is very easy but you need to make sure you are using the right widgest file from one of the methods below by being certain of your Samsung TV series.
Samsung TV’s are either running based on Tyzen or non-Tyzen operating system:
-Tyzen TV’s (J K M N Q R Series):
Click here to download the Tyzen Widget zip file directly from Smart IPTV app server. Once downloaded, unzip it. A folder called userwidget should be created which contains SmartIPTV.tmg and widget.license files. Put that folder on a FAT32 formatted USB flash and then connect the flash to the USB port of the TV. Now if you go to My Apps page, Smart IPTV should show up there. You can then remove the USB flash drive from the TV.
Note: If you are using a J Series TV, before removing the USB flash, Menu > Smart HUB > App Auto Update and disable the auto update feature. You will then never lose the app when TV is restarted.
-Non-Tyzen TV’s (E ES F H HU J4 J52 Series):
Click here to download the Orsay Widget zip file directly from Smart IPTV app server. Once downloaded, unzip it. A folder called SmartIPTV should be created which contains app_icons folder, config_xml, index.html and widget.info files. Put that folder on a FAT32 formatted USB flash and then connect the flash to the USB port of the TV. Now if you go to My Apps page, Smart IPTV should show up there. You can then remove the USB flash drive from the TV.
HOW TO MIGRATE SMART IPTV APP AND THE IPTV ACCOUNT FROM OLD TO THE NEW DEVICE?
We’ve been asked quite frequently about the situation where a client gets a new device, say a new Smart TV, and wants to move Smart IPTV app and the IPTV account associated with to the new device. To avoid complications, do the following and migration should go smoothly.
Migrating the app comes first:
1-Make sure the newly purchased device supports Smart IPTV. You can do that by searching the name of the app on the App Market of the device.
2-Now the step of moving app paid license to the new device: Contact Smart IPTV support team at [email protected] and let them know you want to move to the new device. Provide them your TV MACs of the old and new devices.
The comes moving the IPTV account to the new device:
1-Visit Smart IPTV website at https://siptv.app/mylist/ . This page, as it has been explained in previous tutorials, is where you pair the TV MAC obtained from the app and the m3u url you receive from us as you IPTV account.
2-At the bottom left of this page, you’ll see Delete Playlist field.
Put your old device TV MAC in that field and hit Delete button. This should delete your IPTV playlist which is paired to the TV MAC from app online database.
3-Finally, on the same page, pair the m3u url with the new TV MAC.
4-Reload the new app, Done!
HOW TO ADD IPTV TO OPENBOX V9S?
Unlike Openbox v8s that we are very hesistant about suggesting it as an IPTV device, Openbox v9s can easily and smoothly handle IPTV through the plugin it has.
For this, we need to first make sure our device software is up-to-date and then we move forward with adding the IPTV service.
How to upgrade Openbox v9s software?
1-Click Menu button
2-Move right to NetCenter
3-Choose Upgrade by Network
4-Click Red button to start the upgrade process
5-It should take a while and if the progress bar remains at 0%, that is what usually happens
6-If all goes well as expected, box will reboot itself and we get ready for the next part
How to add IPTV to Openbox v9s using M3U url?
1-Click Menu button
2-Choose Camds Setup – If it’s not there, click number number 6 button four times.
3-Choose IPTV
4-In the new window, on the first row, set Type to XTREAMCODE.
5-Now set server:port , username and password on proper fields.
6-Go down to Default and click OK button
7-Below you should see the Status: changes from NONE to Connecting and if all goes well, it should change to Get Channels Success
8-Click Exit button twice to go back to NetCenter
9-Choose Network App
10-Choose Xtream Code
11-App should load up with the channel list. You can click on Play button to bring up categories list.
In this tutorial, you will learn how to install the Surfshark VPN app on your Fire TV Stick or Fire TV. This app is the only thing you will ever need to protect your data, bypass censorship, enjoy streaming content on your Fire TV device.
surfshark is in TOP 5 vpn providers and has 7 days trial account, you can activate Trial service by installing the app and try to activate inside the app. it may ask your bank information for subscription after 7 days trial, you must give access them but if you cancel the subscription before 7 days you wont charge later.
Install the app
Click on the homepage of your Fire TV and navigate to the search bar.
It is not a difficult task to add subtitles on Kodi.
Here we have used the OpenSubtitles Addon to get Subtitles on Kodi.
#1. Launch any web browser to visit https://www.opensubtitles.org and register an account.
#2. Open Kodi media player and click the Addons option in the left vertical menu bar.
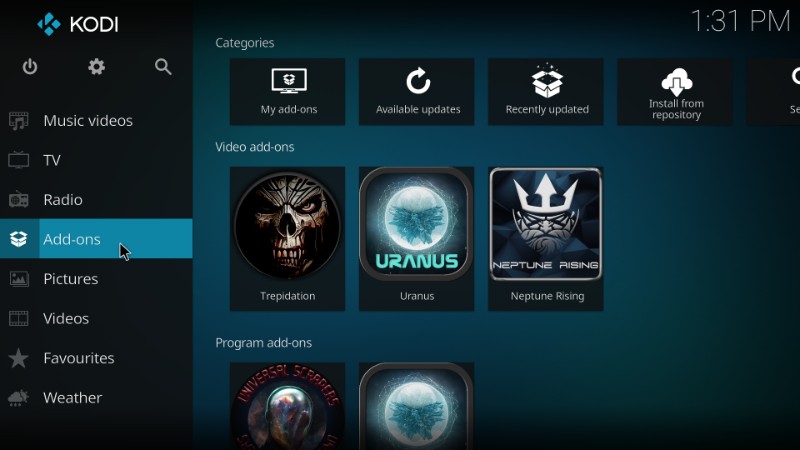
Click Addons
#3. In the Addons page, select the Addon Package Installer icon
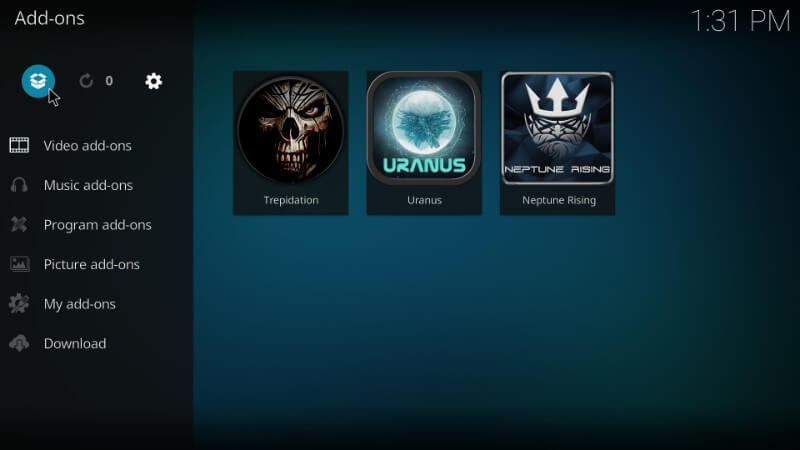
Tap Addon Package Installer Icon
#4. Click the Install from Repository option.
#5. Select Kodi Repository from the list of repositories.
#6. In the Kodi repository page, scroll down and select Subtitles.
#7. In the subtitles list, select OpenSubtitles.org.
#8. Click Install option to install the addon.
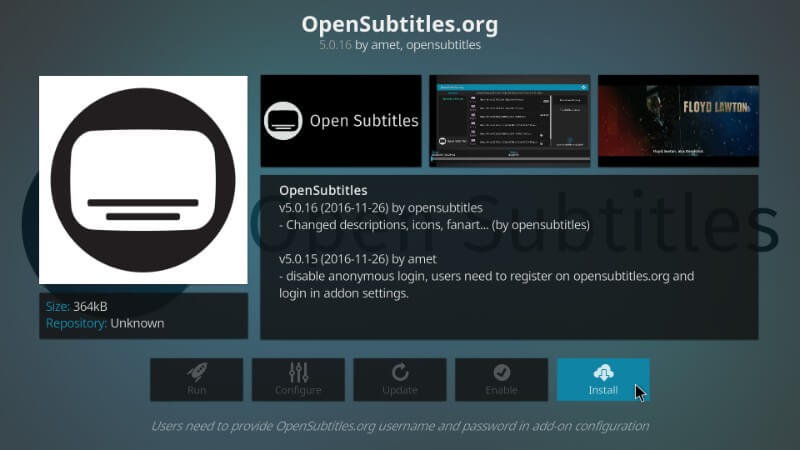
Click Install
#9. Wait till the addon gets installed on the Kodi media player.
#10. In the next page, select OpenSubtitles addon and click the Configure option.
#11. Enter the registered User ID and Password, and click the OK button.
#12. Get back to the Kodi Home Page and Click on the Settings icon.
#13. Select Player Settings or Player in the Settings page.
#14. In the left vertical menu bar, select the Language option.
#15. Under Language option, select Default TV Show service.
#16. Select OpenSubtitles addon from the pop-up screen and click the OK option.
#17. Then select the Languages to download Subtitles for option.
#18. Select your preferred language from the languages list and click OK.
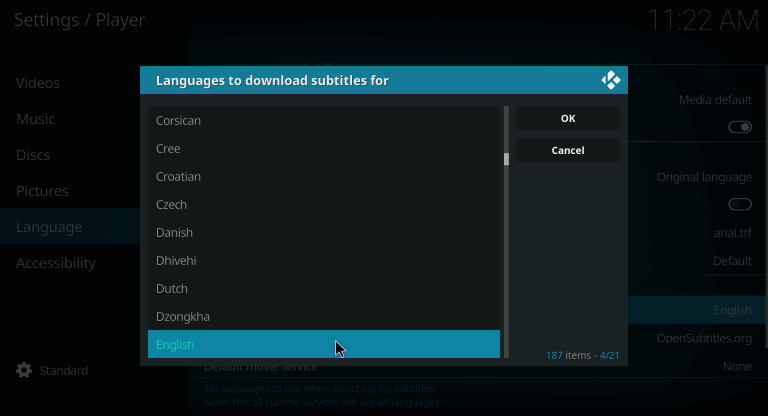
Select language
The above mention method is the simple way to add Subtitles for Kodi media player. This method is suitable for all sort of devices like FireStick, Windows PC, Mac, Nvidia Shield, Android and much more. So enjoy your movies with subtitles by sitting on the couch.
This tutorial will show you how to set up CyberGhost VPN on your Amazon Fire TV / Fire Stick.
System Requirements & Installation
The CyberGhost VPN app is not available for :
First TV Stick, also known as Fire Stick ( 1st generation )
CyberGhost VPN app is available for:
Fire TV ( at least Fire OS 4.6 )
Fire Stick ( 2nd generation and later )
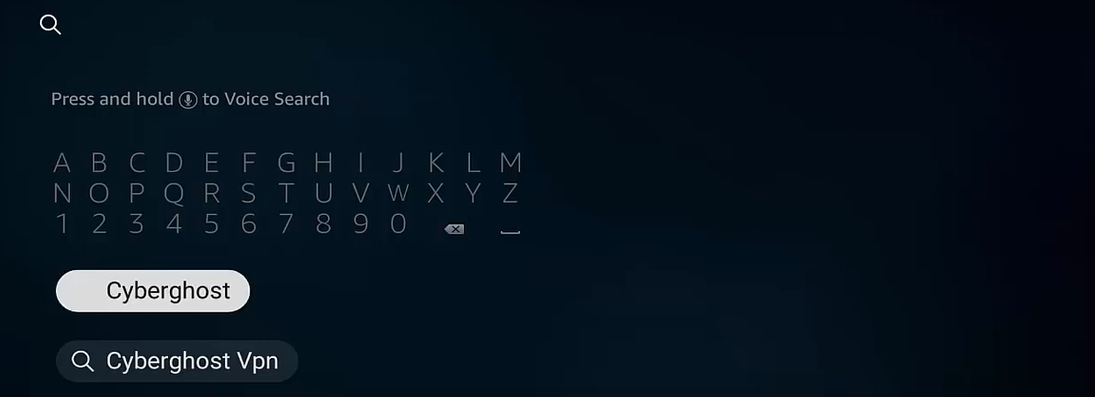
1. Go to the Amazon Store on your Fire TV / Firestick and search for CyberGhost VPN and select our application.
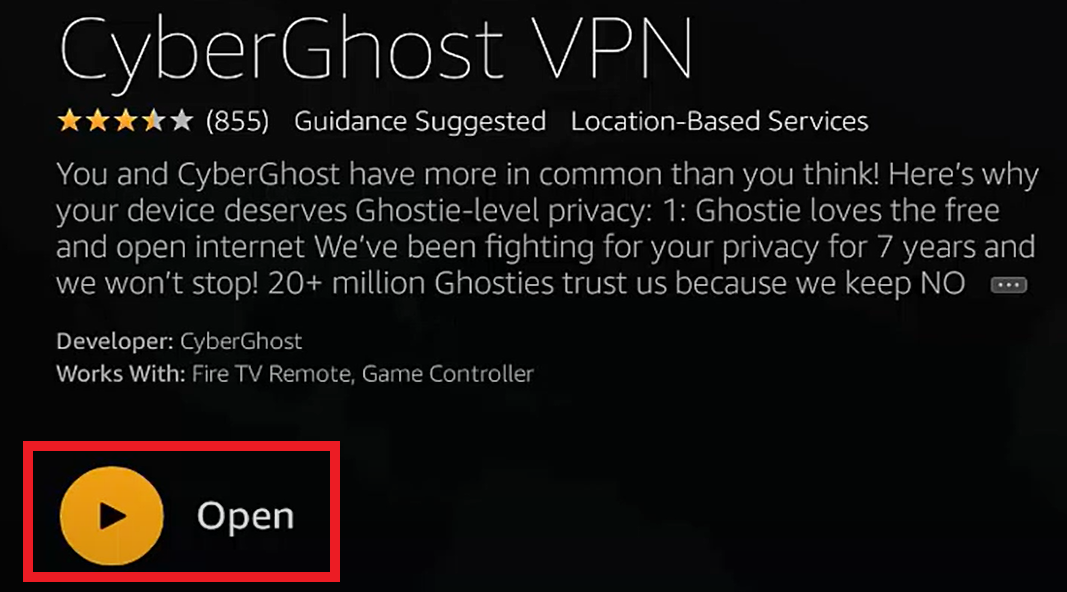
2. Click on the Get button to start downloading the application onto your Fire TV / Firestick device.
As soon as the download is complete, the app will be automatically installed.

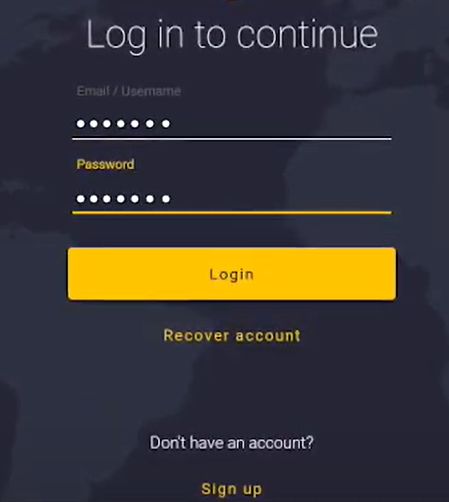
Log into the app
1. Once the installation is complete, you can either click “Open” or press the Burger menu symbol on your remote to launch the application.
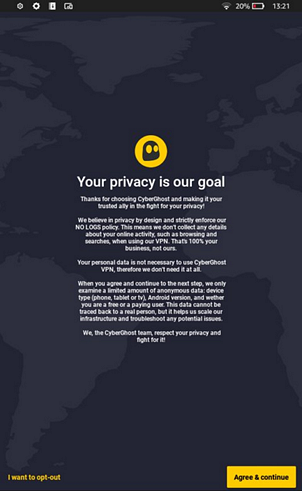
2. Choose “Agree & Continue” if you agree to the sharing of this data or you can choose “I wish to opt-out” if you refuse.
3. The application automatically generates a PIN code. You can validate the PIN code displayed in your online account to log in automatically.
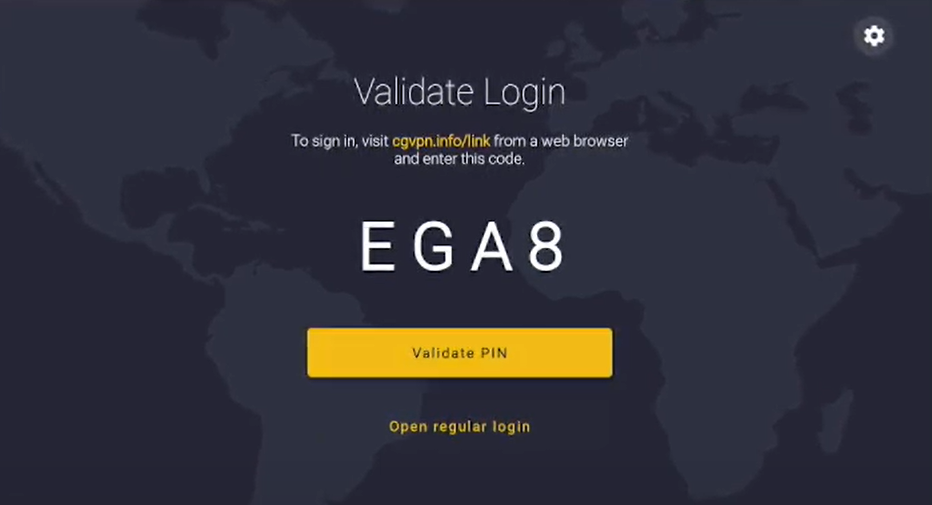
Alternatively, you can choose “Open regular login”. On the next page, enter your CyberGhost VPN username/login and password to log in.
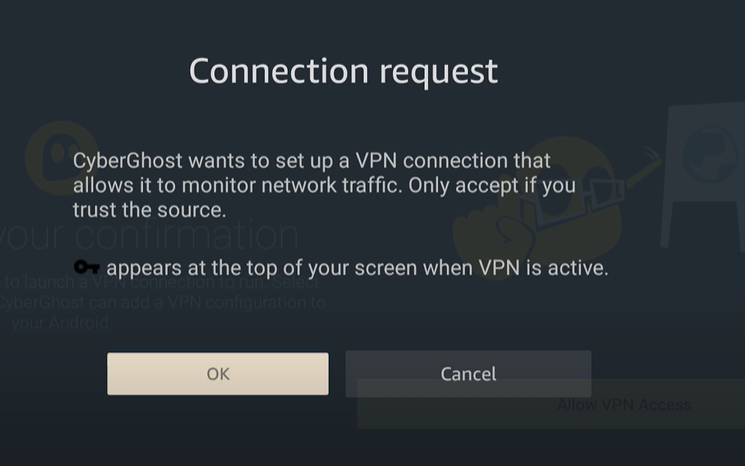
4. In the application, the first time you establish a VPN connection, a pop-up message appears. Select OK to give CyberGhost VPN permission to encrypt your Internet traffic.
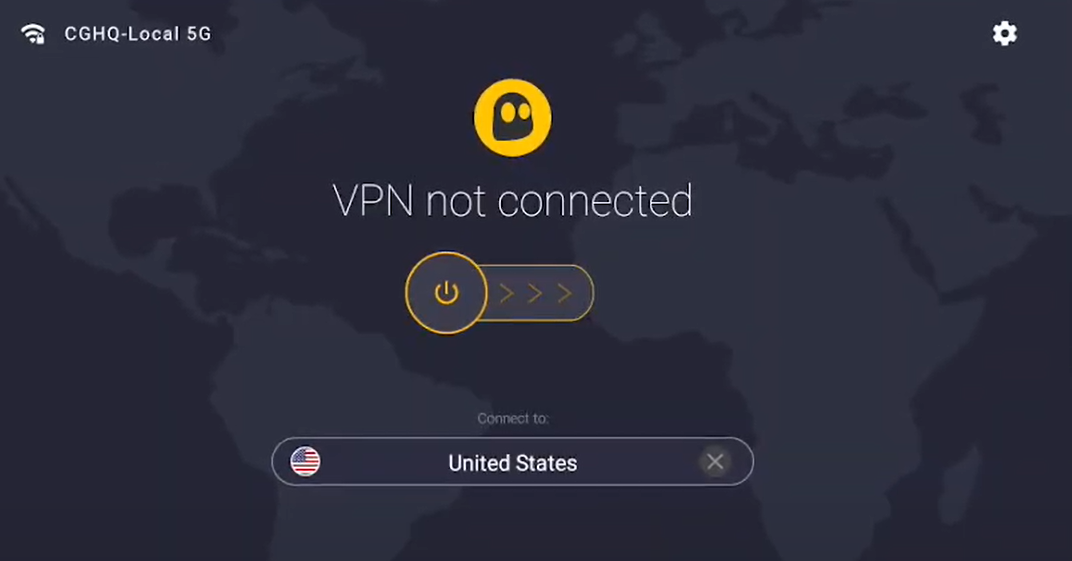
As soon as you connect, you should see the connection status on the homepage of your app.
If it says VPN Connected, your internet connection is secured from now on!
Disclaimer: IPVANISH App WILL NOT WORK on the FIRST GENERATION FIRE STICK!
NOTE: The First Generation Fire Stick (FCCID: 2ABDU-0509) may allow the IPVanish app to be installed and even launch, but that does not mean you can use it. The older hardware in the First Gen Firestick will not allow the app to work properly and may result in making it an unusable device. If you are using a First Gen Firestick, then do not use our app.
IPVanish requires the Gen2 Fire Stick (or newer).
*** NOTE: Some generation 1 sticks do also now come with an Alexa Voice remote, so please check the FCCID number as mentioned above to see if you have a generation 1 Fire Stick ***
It is the user’s responsibility to make sure their devices will work by researching compatibility FIRST. Again, ONLY use the Gen2 fire stick (or newer) or the Fire TV.
Getting Started
The following is required for IPVanish VPN to work with the Amazon Fire TV or Amazon Fire Stick:
A secure IPVanish VPN connection (Don’t have one? Sign up here!)
An internet connection
Amazon Fire TV or Amazon 2nd Generation or later Fire Stick
IPVanish Amazon Application Install
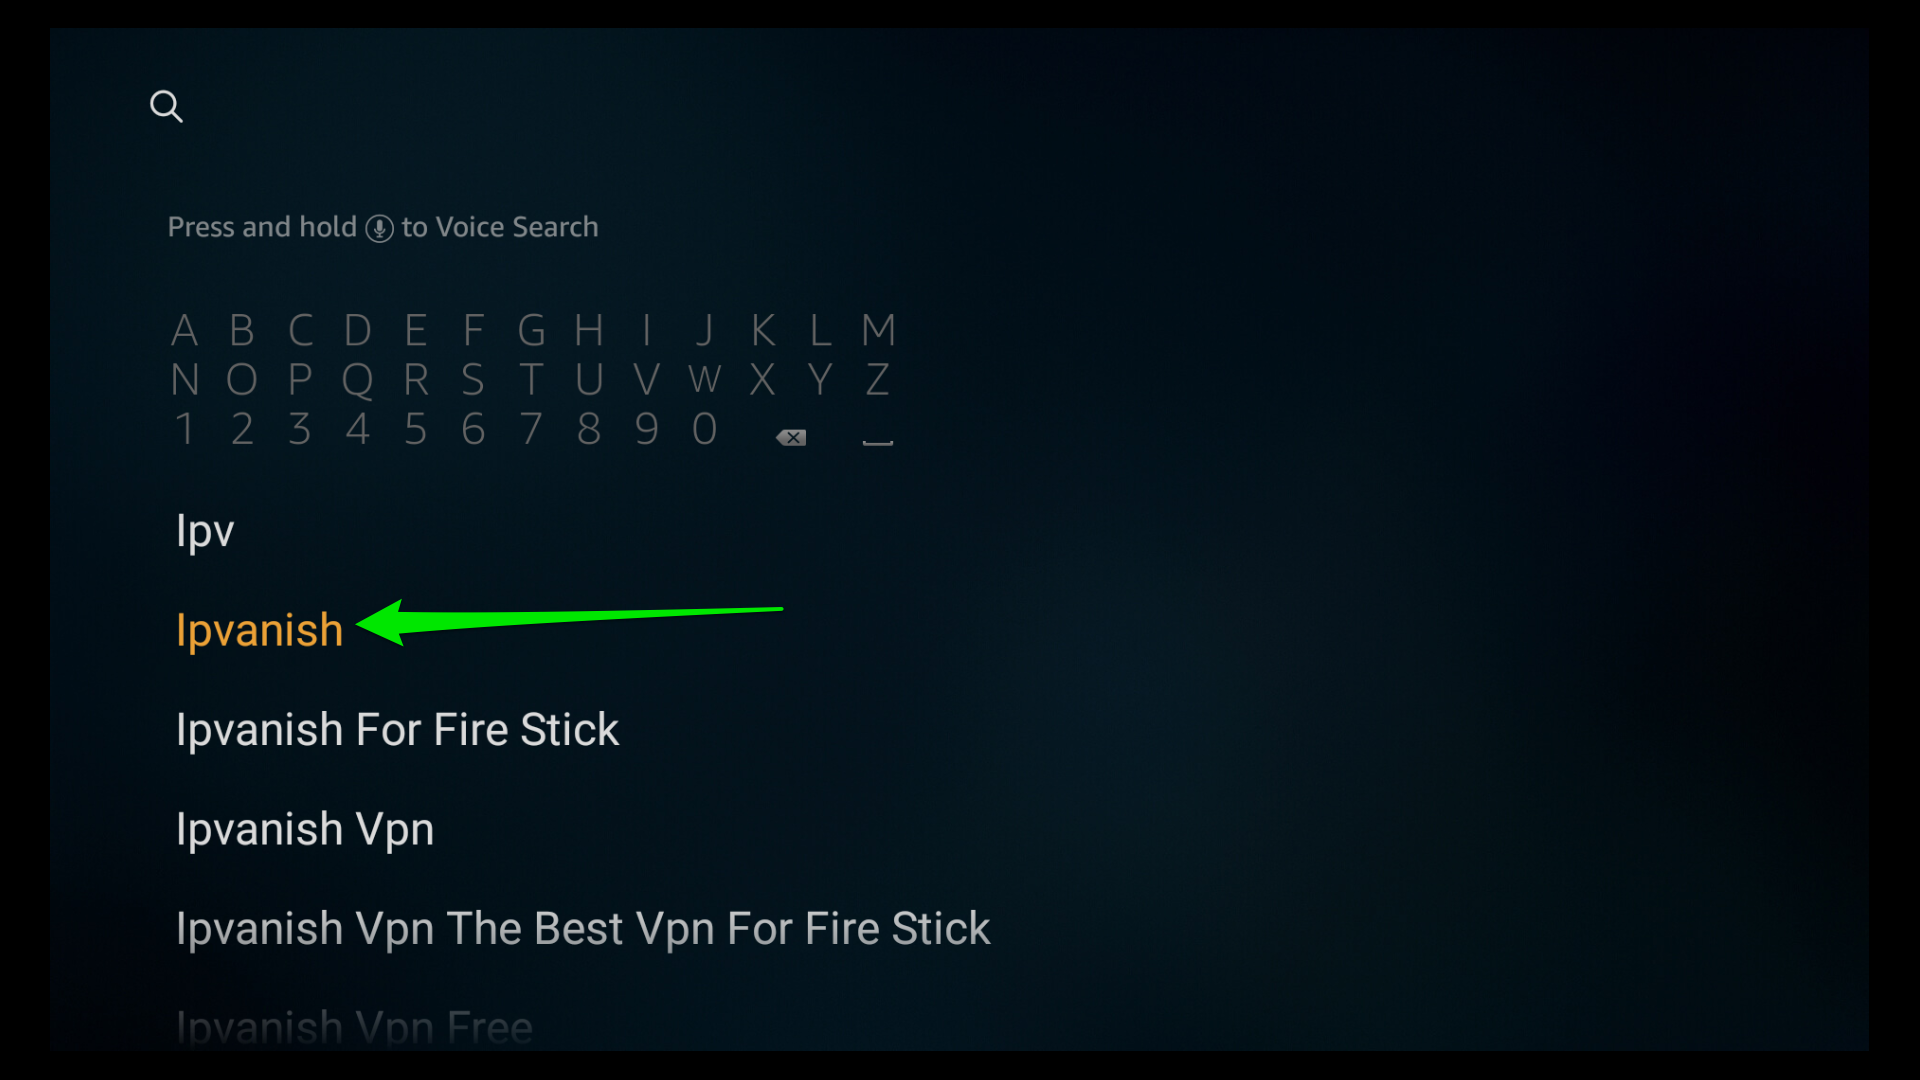
1. Press the Home button on your Fire Stick remote to return to your home screen.
Next, press the left arrow on your directional pad at the top of the remote to select the magnifying glass to search for the IPVanish app.
2. Use your Fire Stick remote to type ipvanish into the search page, then select Ipvanish from the list that appears.
3. Select the IPVanish app from the Apps screen.
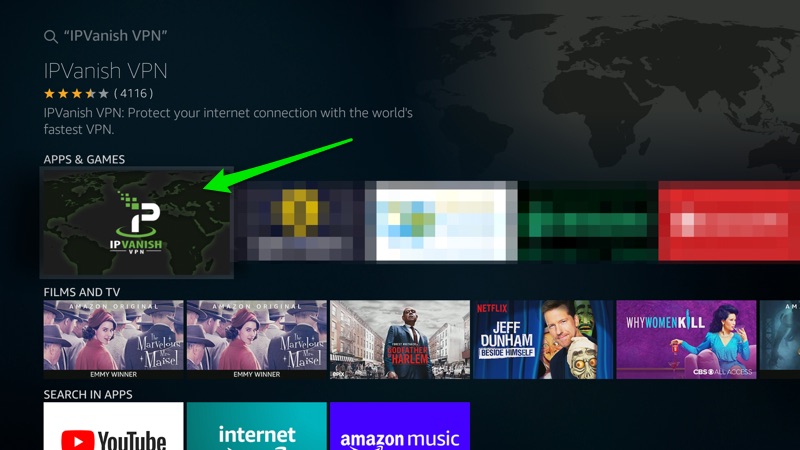
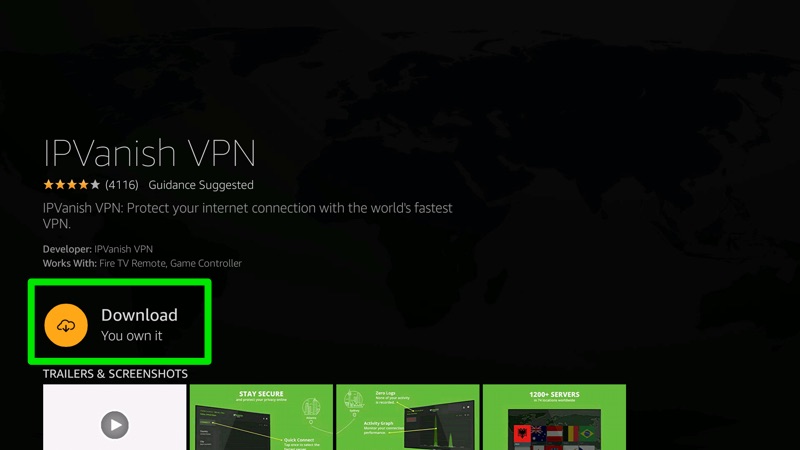
4. Select the Get button or Download button if you have downloaded the IPVanish app in the past.
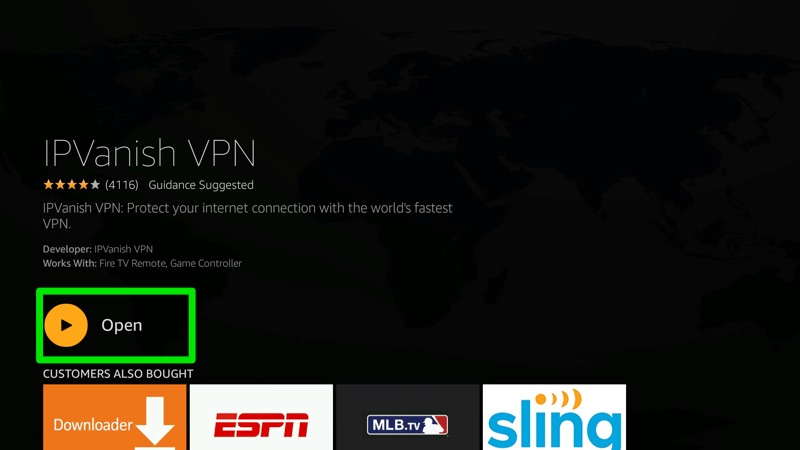
5. Select the Open button to launch the IPVanish app
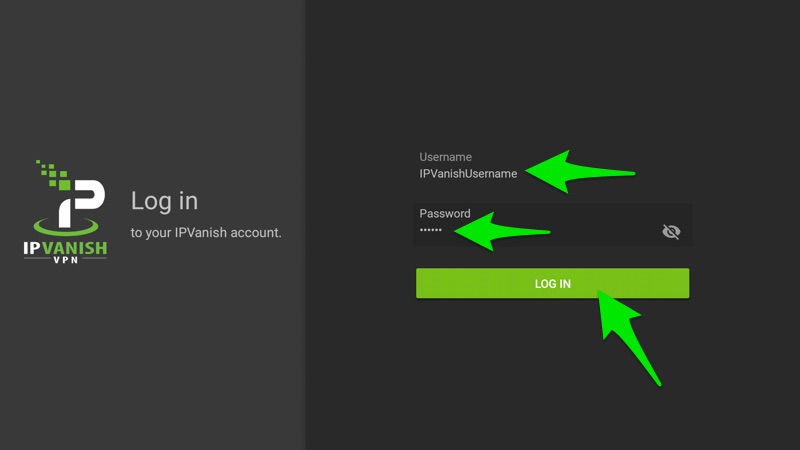
6. Enter your IPVanish Username and Password to log in to IPVanish, then select LOG IN.
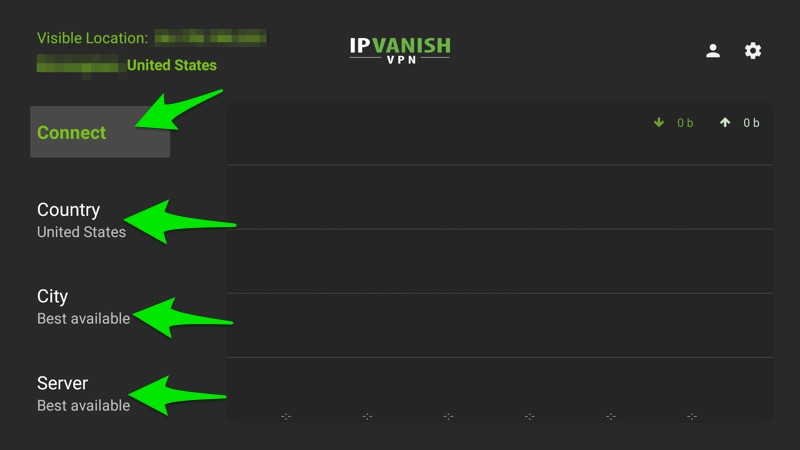
7. Once logged in, you can pick a Country, City and Server to connect to and click the CONNECT button or you can use the Best available default to connect to the best VPN server for your location.
Once you are connected, you can go back to your home screen and all of your applications will be routed through our VPN.
To open the IPVanish app once installed select the IPVanish icon from Your Apps & Games.
Note: If you are able to get the IPVanish app installed on your Fire Stick, but you lose network connectivity to Amazon services shortly after connecting, then it is likely you have a 1st generation Fire Stick which does not support our app.
